Summary of all Upgrades for the Anycubic Mega
Because of the CoronaVirus, some sellers currently don´t ship and therefore some links don´t work I´m sorry.
|
With this, I want to sum up all basic upgrades, mods, some suggestions and more.
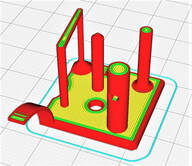
I have made a little test print you can try to print. You can download it here:
|
| ||
|
If you have the original I3 Mega, and want to be able to print TPU, you therefore can upgrade to the Mega S with this kit:
But with the new extruder, you need a new firmware and/or change and calibrate your E Steps.
For this you should check out this post: Firmware |
|
This Guide includes:
- some basics, mods and upgrades for the bed
- some suggestions for the hotend (cover, silent fan, better cooling)
- new spool holder and better management of the filament
- some design advancements
- vibration dampers
- making the printer completely silent (fans, new motor drives)
- some useful tips for a firmware upgrade
Contents
Cura
All about Cura you can find here: Cura
Basics
So first, everything you really need, or which is easy to do.
Bed
Leveling!
Then, you really must level the bed perfectly. Do it as long, as it is perfect (at least for you). I really had problems with my front right corner, because when I loosen it, the rear left goes down and vice versa. Also, my bed is also not perfectly flat, but it works. You maybe have to change the screw wich hits the end stops.
Bed handle
One more thing for the bed, a little bed handle so you don't burn your fingers:
You can use this or this.
|
Y-Tensioner
I still haven´t tested this. But if you want, you can go for it: Y-Tensioner Bed isolation The bed has no isolation, further a lot of heat is lost and the heating takes longer. Therefore, you can install a isolation. |
|
Hot End
|
I still use the original hotend, therefore I will only show upgrades for this one.
But I´m planning to upgrade. Cover/Case So first, I made a new Cover with bigger (Honeycomb Style) holes, for a better airflow: Hotend Cover For this cover, I would recommend that you change the right fan for a silent one like this: The left turbo fan is quite good, and I would keep it. It cools the part enough.
Paragraph. |
|
Part Cooling Fan Duct
There are several designs for fan ducts. I would say they really help, and I also use one.
A really big advantage is, that they provide cooling from both sides.
I use this one: Part Cooling Fan Duct
I do not have tested other ones, but just search for Anycubic I3 Mega Fan Duct.
There are several designs for fan ducts. I would say they really help, and I also use one.
A really big advantage is, that they provide cooling from both sides.
I use this one: Part Cooling Fan Duct
I do not have tested other ones, but just search for Anycubic I3 Mega Fan Duct.
|
Covers and cable management
This is just a little cover, doesn't do much, just protect the cable: cable holder When you print high objects, the cable may get squeezed at the top. I use this little cable guide: cable guide For this, you must cut the old cable ties and put new cable ties on it. |
|
On these pictures you can see how i installed the new fan.
|
|
Filament
Filament Spool Holder
(You don´t need this for the new Anycubic S Pro (Mega S)
Basically, the original filament spool holder is crap.
I remixed one from philwild. Mine fits perfectly together with the thing I will talk about next.
This is my filament spool holder: Filament Spool Holder
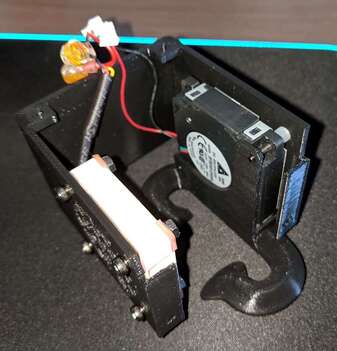
Filament Sensor Holder
(You don´t need this for the new Anycubic S Pro (Mega S)
I really had some Problems with the original magnetic ball thing. It always fell off, then I tried some other holder which leaded to filament breaking. So I designed my own.
With this holder, the Motor is mounted at an angle, so the filament doesn't bend as much. Furthermore, the angle to the Spool holder is much better.
This is my Sensor Holder: Sensor Holder
However, you can also just disconnect the sensor.
(You don´t need this for the new Anycubic S Pro (Mega S)
Basically, the original filament spool holder is crap.
I remixed one from philwild. Mine fits perfectly together with the thing I will talk about next.
This is my filament spool holder: Filament Spool Holder
Filament Sensor Holder
(You don´t need this for the new Anycubic S Pro (Mega S)
I really had some Problems with the original magnetic ball thing. It always fell off, then I tried some other holder which leaded to filament breaking. So I designed my own.
With this holder, the Motor is mounted at an angle, so the filament doesn't bend as much. Furthermore, the angle to the Spool holder is much better.
This is my Sensor Holder: Sensor Holder
However, you can also just disconnect the sensor.
Overall
|
Tool Rig
This is just a nice tool rig. You can put all your tools in. Nothing more to add. Tool Rig And a holder for your caliper: Caliper Holder |
|
Face Plate
This will really let your printer be the best out of all. Ok, no. It's just for aesthetics.
So I want to list here 2 different Face Plates.
On my printer, I use this one: FacePlate
The white under this plate is just paper or any other material. Can be any color.
The other one: FacePlate
This will really let your printer be the best out of all. Ok, no. It's just for aesthetics.
So I want to list here 2 different Face Plates.
On my printer, I use this one: FacePlate
The white under this plate is just paper or any other material. Can be any color.
The other one: FacePlate
|
Vibration
The printer can sometimes vibrate very much. The simple way: Just put some foam (when you order something, you will get some for sure) under the feet. It will help some, but not for long. But I still use it (I just order enough). Nevertheless, you can print this: Squash Feet These ones are not as high. (with my guide, you don't need to mount the power supply fan outside, so the printer doesn't need so much space beneath it.) For this vibration dampers you need 4x Squash Ball: |
|
|
Lighting
I don´t have any lightning installed on my printer. But this is the next thing I want to do. Ok, so there are basically 2 variations. Lightning on the hotend, or lightning on the housing. For the Hotend: A ring lightning which directly lights the printed part: Ring LED Holder A compatible led would be: Important! If you also have the fan duct installed, you need this one: Ring LED Holder 100mm Furthermore you´ll need to buy the bigger 100mm Ring LED Or you just glue some led´s into the cover. You need some 12V LED.
To install it, just connect it to the right fan cables.
For the Housing: A led stripe around the printer. To mount it print this: LED Mount And a led strip: You can cut the strip and just connect it to the powersupply.
|
|
Advanced
Ok, so you have done all above, but want your printer to be even better?
What about that loud sound’s you printer does? Do you have some Z wobbling?
OK, then make the Anycubic silent.
At this step, you have to open the bottom plate of the printer. Please turn the power off and unplug the cable!
What about that loud sound’s you printer does? Do you have some Z wobbling?
OK, then make the Anycubic silent.
At this step, you have to open the bottom plate of the printer. Please turn the power off and unplug the cable!
Silent Printer
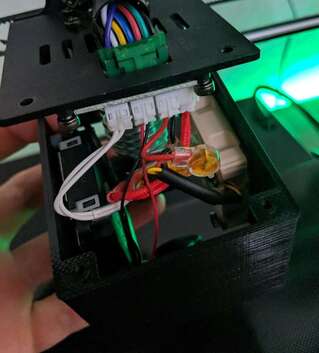
Power Supply Cover and Fan
One of the loudest fans on this printer is the PSU fan.
So, I again got inspired from some other designs, and designed my own PSU cover.
On the one side, the power supply gets much more air, on the other side, it is much quieter with it.
This is my design on Thingiverse: PSU Cover
You can also stay on my website: PSU Cover
|
Motor Driver Fan duct and Fan
Ok, next on the list is the fan next to the power supply. For this, I would recommend printing this fan duct: Fan Duct Again, you also need a new, not as noisy fan. You need a 40mm x 10mm fan: For the fans, use the included orange plastic things to tighten them to the cover or fanduct. They reduce the vibrations a lot.Paragraph.
|
|
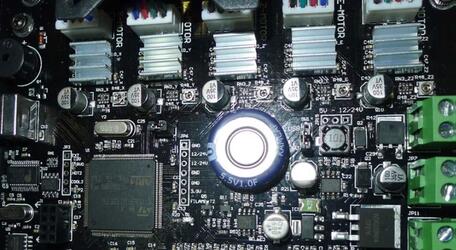
Motor Driver
When all your fans are quiet, there is still one sound. It's a very high-pitched annoying sound.
But first check, if you even can swap your driver. On some, they are soldered on. On others not. It depends when and where you bought the printer. For this, you have to open your printer.
When all your fans are quiet, there is still one sound. It's a very high-pitched annoying sound.
But first check, if you even can swap your driver. On some, they are soldered on. On others not. It depends when and where you bought the printer. For this, you have to open your printer.
|
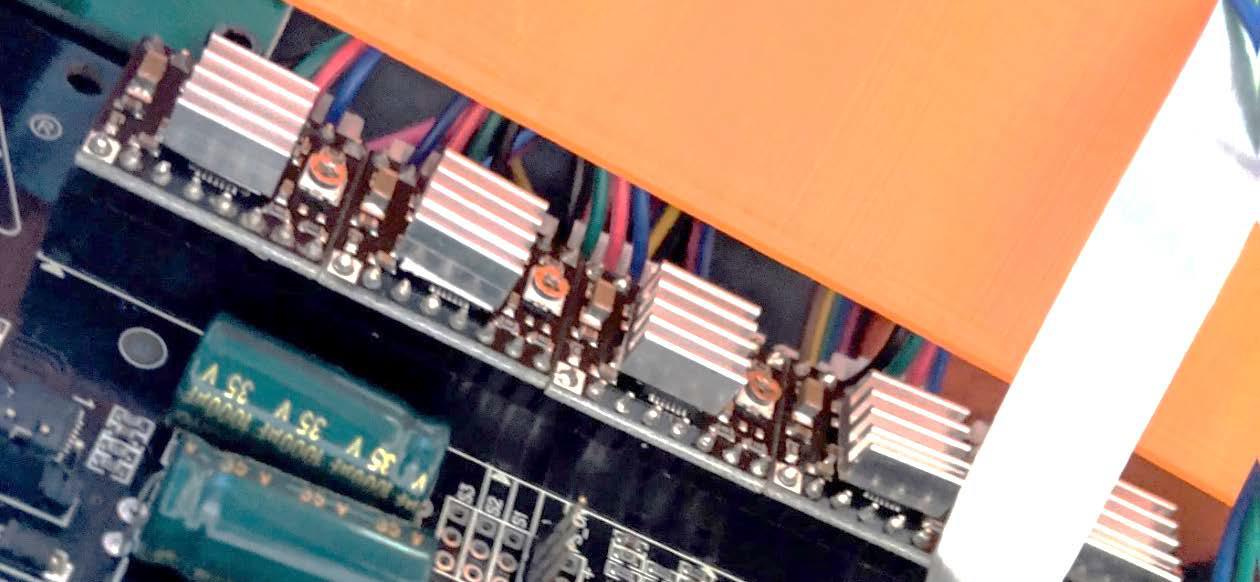
Swappable drivers would look like these: (the 5 black pieces with the heatsink on it). There is this black mount below.
|
The 32bit Trigorilla board has soldered drivers. When it looks like the picture below, you can´t easily swap your drivers.
|
|
So if you have the swappable drivers you can go on.
If you have the board on the right picture you can only buy a new Trigorilla board. So, you will need 5x TMC 2208: (for: X, Y, Z, E0 (Extruder), E1 (second Z) There are some different versions on the market. If you can find some, which are called V2.0 you just can swap then out. Also, when you get them, check again if they are really V2.0 If you don´t find any, or got delivered others, you have to flash a new firmware. Be sure, to then take the right hex file (Marlin-AI3M-vx.x.x-TMC2208.hex). You can find more to this under the section Firmware. I recommend these: Now to the installation:
Look at the marks on the board and on the driver, don´t put it in in the false direction. When you install it, you must also check the voltage and probably change it. For this you will need a mutlimeter.
|
|

Testing
Now just test all axis. They should all work.
If not, open the printer again, and check if any driver is very hot (nearly burn your fingers). If yes, this driver is maybe broken.
If no one is too hot, check the voltage again. Than check the cables if every is plugged in correctly.
If it still don´t work just comment.
Than test it again.
Also test printing a part.
When you get shifting layers or under extrusion, you have to increase the voltage a bit (in 0,05V or 0,1V steps)
Other
|
Z-Wobble
Ok, maybe you have noticed it, maybe not. But the clutches for the Z-Axis are very stiff. Therefore I changed them with better ones. These ones are much more flexible and will eliminate any Z-Wobbling.
But the installation is kinda pain. You must unscrew the motors from the top, and then put the clutch out. When you have the opportunity, you should take the screw drive out, and clean it (You will never do it again). After cleaning, put a some oil or lubricant on it again. |
|
|
Mosfet
Personally, I don´t have one. But there is a slight chance, that the motherboard could get to hot. Furthermore, it could than be destroyed. You can print this Mosfet Holder: Mosfet Holder He also explains how to mount it. And then buy two 2 pieces of this mosfet: |
|
Firmware
The features of a new firmware:
- No more annoying sound at the start.
- PID Control
- 12V at fan
- Better print quality
- Thermal runaway protection
- mesh bed leveling
This guy did a really good job. He also describes everything good: Firmware Upgrade
Please also read his explanation carefully!
But I will also do some simple explanation.
If you use still your stock driver take this version:
Marlin-AI3M-vx.x.x-stock_drivers.hex
When you have the TMC2208 V2.0 take this version:
Marlin-AI3M-vx.x.x-TMC2208_reversed.hex
With any other (like TMC2208 V1.2) take this version:
Marlin-AI3M-vx.x.x-TMC2208.hex
To do the update, you now have to connect the printer to your pc.
Now, just open Cura, and go to Setting -> Printer -> Manage Printer -> and update firmware
Now select the right .hex and update it.
Calibration of the Extruder
First, you will need to download Pronterface:
Just start it up and connect it with your printer via usb cable.
Connection with MacPronterface Printrun software on Mac is via /dev/cu.SLAB_USBtoUART and is 250000
Connection with MacPronterface Printrun software on Mac is via /dev/cu.SLAB_USBtoUART and is 250000
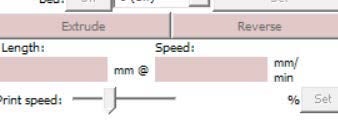
If the field under extrusion is red and you can´t write the extrusion length in it like it is on the picture below,
than follow try this steps: Printrun Pronterface Fix
than follow try this steps: Printrun Pronterface Fix
Now on the printer, remove the plug or fitting on the extruder in which the filament tube is inserted.
Than cut the filament at the top of the extruder so you can measure the length later.
Now in Pronterface:
Write in the space right: ” M503 “and send it.
Should look like this:
Than cut the filament at the top of the extruder so you can measure the length later.
Now in Pronterface:
Write in the space right: ” M503 “and send it.
Should look like this:
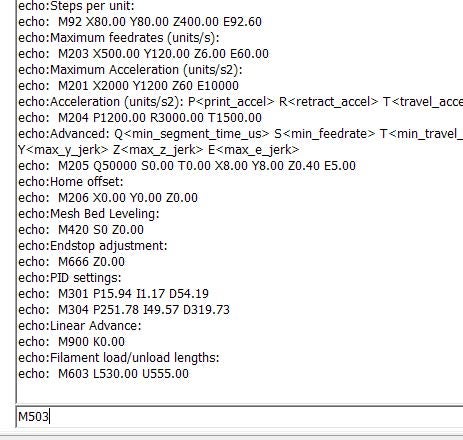
Now search the “ M92 X80.00 …. “ line and note the values : E xx.xx
For example, mine: E92.60
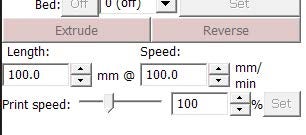
At the left fill in at length:100mm at the speed 100mm/min
Than extrude 100mm filament
For example, mine: E92.60
At the left fill in at length:100mm at the speed 100mm/min
Than extrude 100mm filament
Now measure the length:
I measured: 96.56
Now calculate:
100 / measured * noted xx.xx
For me:
100/96.56*92.60 = 95.90
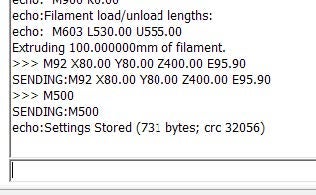
Than copy the “ M92 X80.00 …. “ line and change the E to your calculated E.
My Line would look like this:
“ M92 X80.00 Y80.00 Z400.00 E95.90 “
Copy your own line than into the field and send it
Than type M500 and also send it.
I measured: 96.56
Now calculate:
100 / measured * noted xx.xx
For me:
100/96.56*92.60 = 95.90
Than copy the “ M92 X80.00 …. “ line and change the E to your calculated E.
My Line would look like this:
“ M92 X80.00 Y80.00 Z400.00 E95.90 “
Copy your own line than into the field and send it
Than type M500 and also send it.
Now you should be finished!
List of Spare Parts
Some spare parts which are special for the Anycubic Mega:
|
The Mainboard
|
The original Hotend
|
The Ultrabase bed
|
Orignal Nozzle
|
Thermistor
|
|
|
|
|
|
|
Furthermore, There is a list of typically parts that are built into a printer:
Thank you!
Just wanted to say thank you to this amazing community.
To everyone, who also built anything to make this printer better.
To everyone, who is helping others.
And especially to these people, which helped me at the beginning.
To everyone, who also built anything to make this printer better.
To everyone, who is helping others.
And especially to these people, which helped me at the beginning.
(*) This all was a lot of work, so I decided to make all my Amazon links, which I would have included anyway, to affiliate links.
There are not any costs for you. But when you buy with my link, I earn a bit.
Also if you want to donate you can do this here:
